
Aluminum Yo-Yo
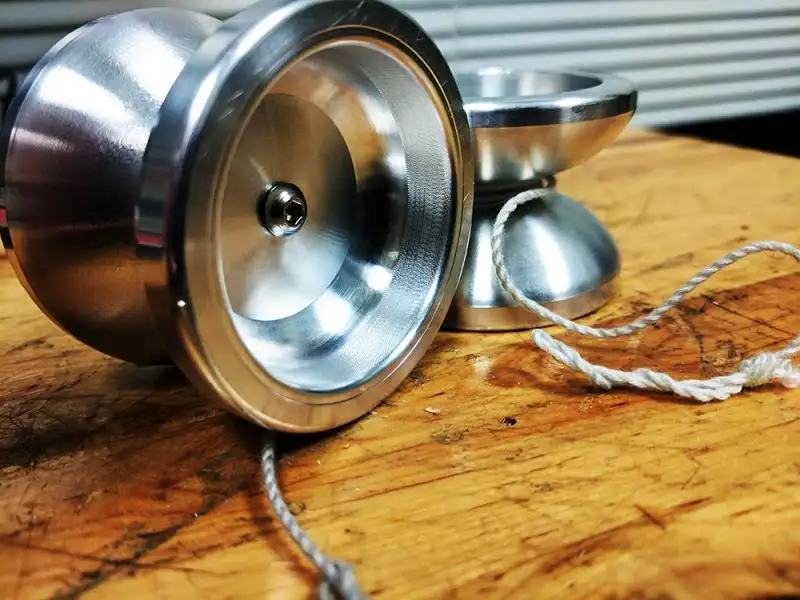
This project will walk you through CNC machining the parts needed to build a modern “butterfly” yo-yo on your Tormach Slant Pro CNC lathe.
BILL OF MATERIALS
- 2.5” diameter 6061 aluminum that is at least 3” long
- Yo-yo factory upgrade kit
- Yo-yo string
- M4 set screw
TOOLs
- Stop-loc
- Right-Hand Grooving Tool
- 5/8” Right-Hand Boring Bar
- M4 Tap
- #30 Drill Bit
- Right-hand OD Turning Tool
STEP BY STEP
- The first step in any project is to come up with a good plan! I designed and prepared the CAD/CAM files needed to make this yo-yo in Fusion 360. The CNC operations that are used to make this yo-yo are separated into two setups. This project uses the Turret on the Tormach Slant-PRO Lathe. You’ll be working on the X+ side of the part with grooving tool and the boring bar. The drill bit and tap work at X-0, and move on the positive side.
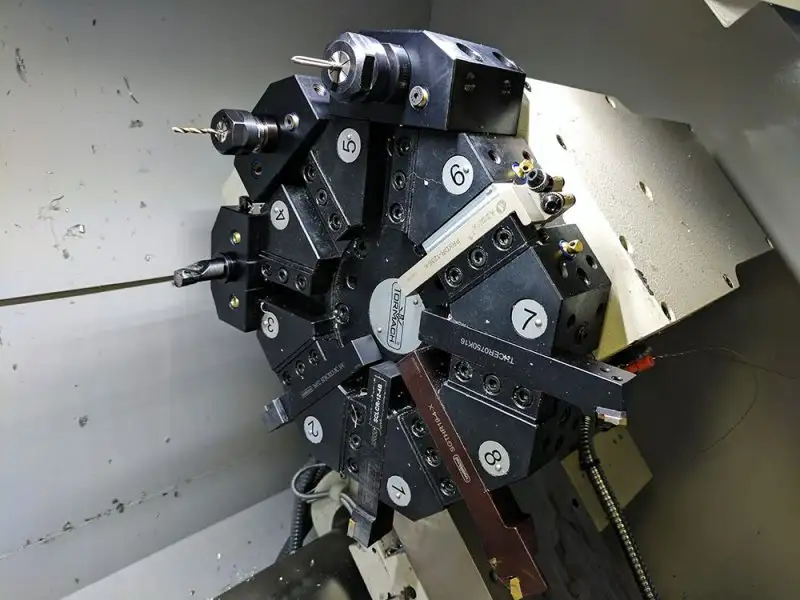
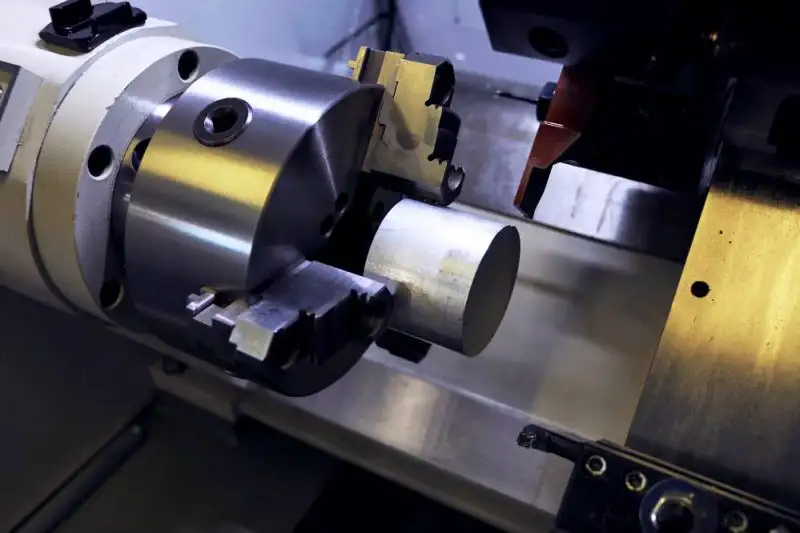
- In this project, we are going to use five tools that need to be loaded into the lathe turret. In the above image, you can see how I installed the tools into the lathe, what tool holders I used and what numbers I put them in to match the machining operations in the fusion 360 CAM file. The tool list is as follows:
- Tool number 1 is the OD Turning Tool
- Tool number 3 is the 3/8” Right Hand boring bar
- Tool number 4 is the #30 drill bit
- Tool number 5 is the 4 mm tap
- Tool number 8 is the Right-hand grooving tool
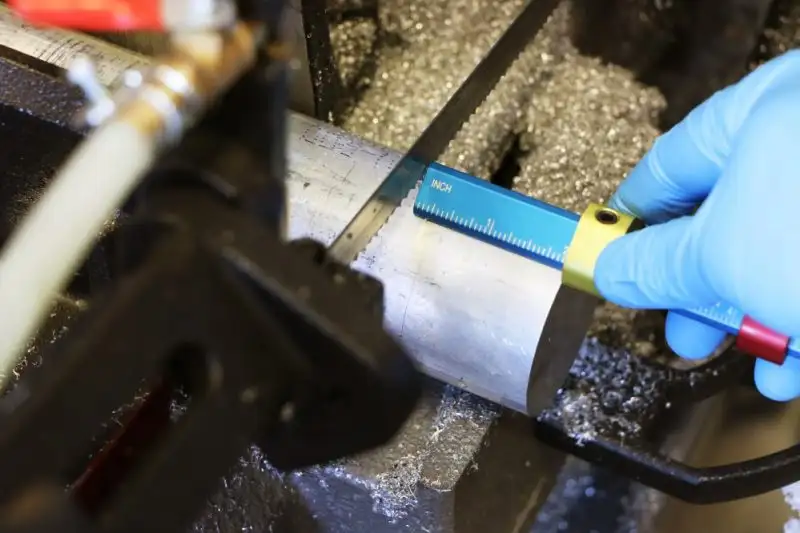
- After your tooling is ready to go it is time to prepare the raw material. I used a Stop-Loc to set two measurements. The first one is the gold colored stop, it is set at 2” and is used to measure and cut the material to the correct length. The second red colored stop is set to 4 1/8”. The backside of this stop is used to set the stick out of the material in the lathe chuck to the correct length.
- In this image you can see me using the Stop-Loc to set the length of the 2.5” diameter aluminum round used to make the yo-yo half. This tool makes it easy to cut multiple blanks to the correct length.
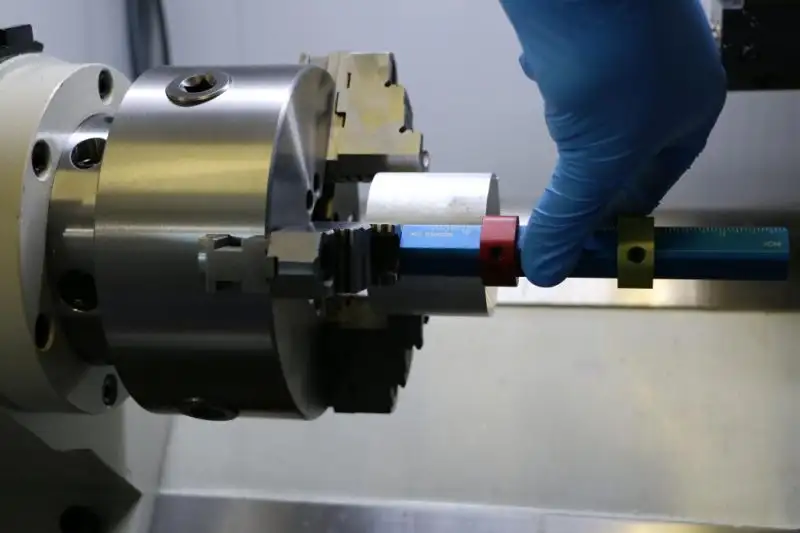
- Once my blank was cut out I used the second side of the stop-loc to set the material the correct depth in the three jaw chuck. Having the material stick out the proper length is important to avoid crashes.
- Once the material is tightened down in the lathe you will need to use the parting tool to face it off and set the machine Z axis to zero. You should already have all of the other tools properly touched off at this point. It is now time to load setup one from Fusion 360 into Path Pilot and get cutting.
- The first tool to run in the program is tool number one which is the OD turning tool. It is used to clean up the outside of the stock in preparation for the other operations, and create some of the initial edges for the part.
- The next tool in the program is tool number four, which is the drill bit. It is used to create a pilot hole for the tap.
- The next tool is tool number three, the boring bar. It is used to remove the bulk of the material on the inside of the yo-yo.
- The next tool is tool number five which is the M4 tap. This creates the threaded hole where the center shaft screws in and attaches the two halves of the yo-yo together.
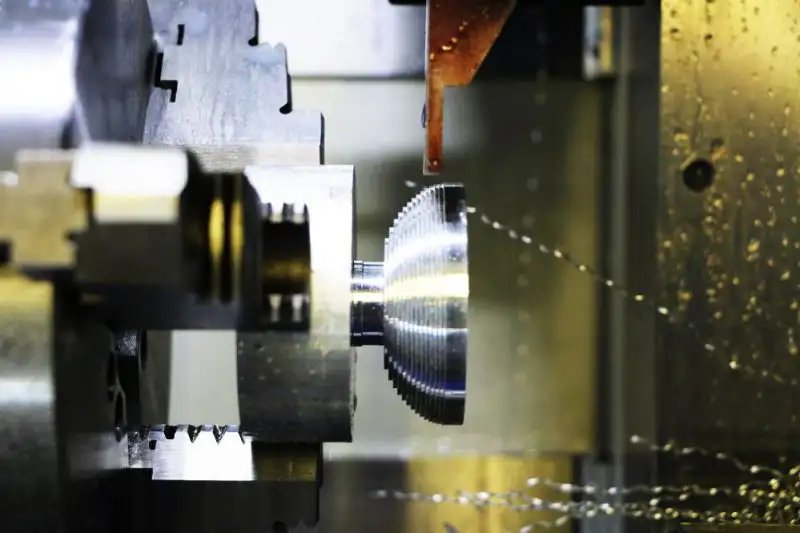
- The final tool is tool number eight, the right-hand grooving tool. First it will cut several roughing passes, leaving the yo-yo with a stepped look.
- Once the roughing passes are complete, the lathe goes back and starts running the finishing passes. First it smooths the steps away, then it cuts the last few features into the back of the yo-yo, and finally it parts it off. A small Pip will be left on the back side of the yo-yo that will need to be filed or sanded away.
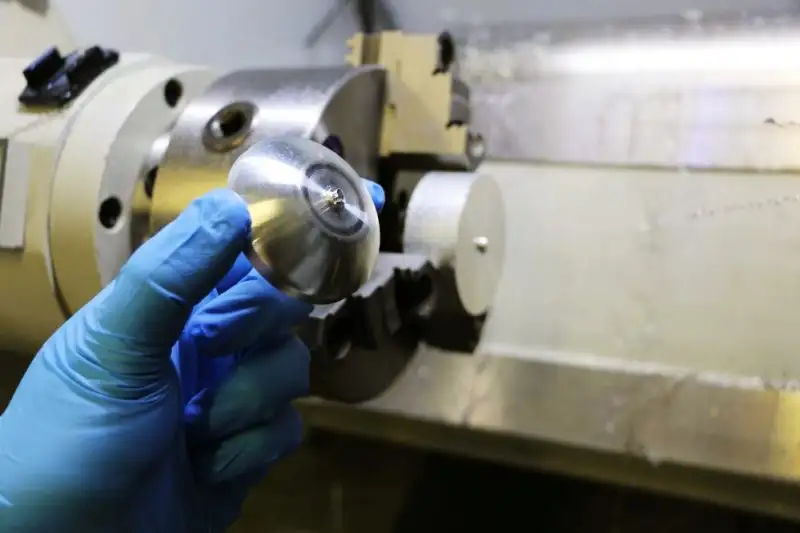
- Once you have machined the first half of your yo-yo you will need to go back to the beginning and do it again. When you have the second half complete, you are ready to assemble!
- You will need the yo-yo factory upgrade kit (or a similar bearing) and string mentioned in the bill of materials.
- To start assembly, first peel the backing off the self-adhesive response pads and stick them on each half of the yo-yo. Try to position them as close to concentric as possible. These help the yo-yo to bind and re-wind when you attempt to pull it back to you.
- Once the response pads are in place you will then need to install the center shaft, bearing, and string. The M4 threaded center shaft is first threaded into place. Then you press the bearing onto the shoulder on the back of the yo-yo. Once the bearing is in place untwist the very end of the yo-yo string to create a loop and place it over the bearing.
- The last step to finishing your new yo-yo is to take the second half and screw it onto the half that you just assembled. Your new yo-yo is now ready to play with and customize!
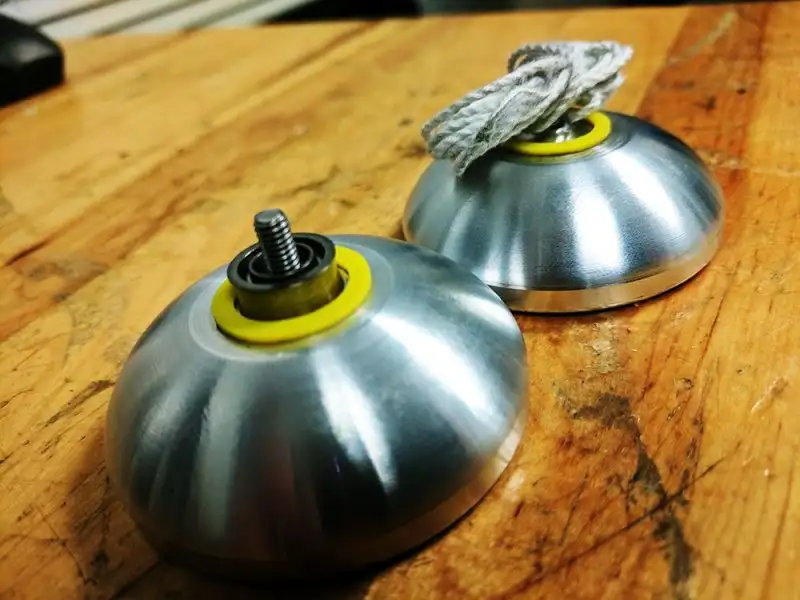
By swapping out the response pads and string type you can tune the responsiveness of your new yo-yo until it reacts just the way you want it too.