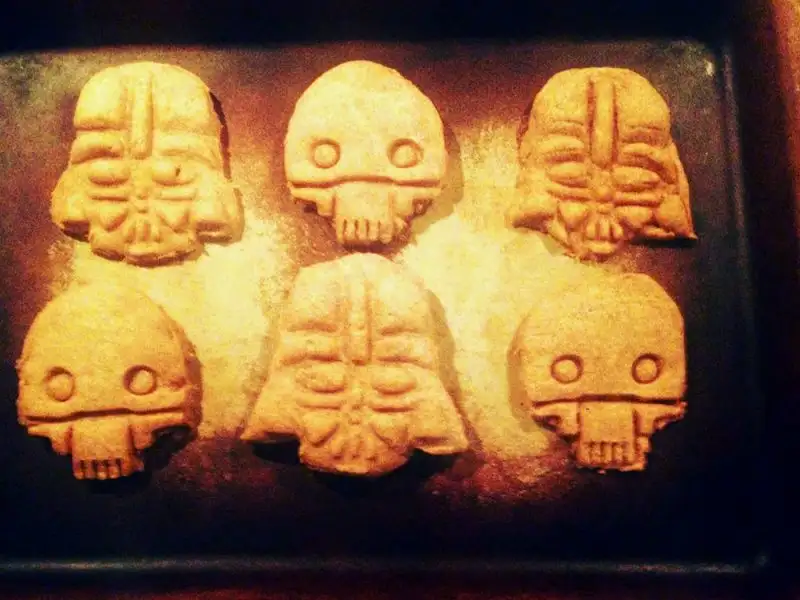
Darth Vader Cookie Mold
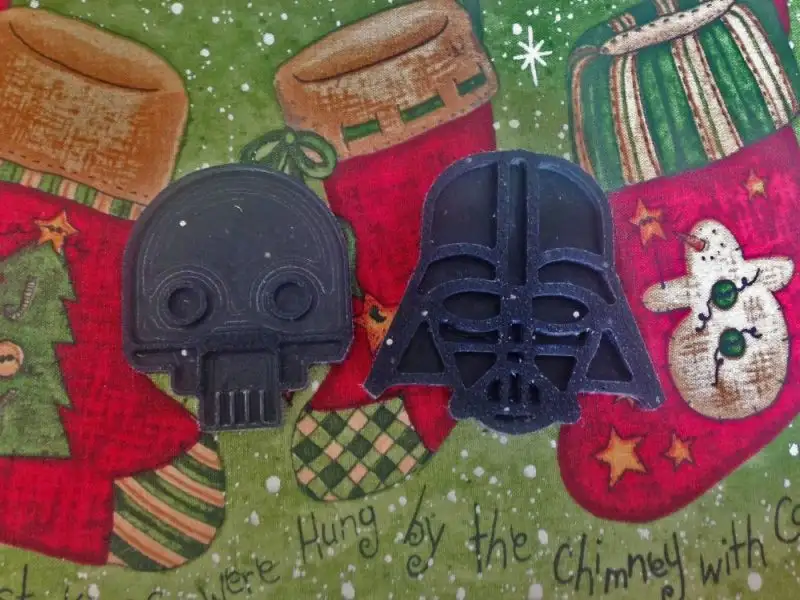
In this project, we are going to make a mold for Darth Vader shaped cookies from a plastic cutting board. I used cutting board material because it's food safe. This is a simple project with only one side of the material that needs to be milled.
BILL OF MATERIALS
- 3/8” Plastic cutting board of any size
TOOLS
- 1/16” 3 Flute End Mill
- 1/8” 3 Flute End Mill
- Tormach PCNC 440 or PCNC 770 Mill
- Vise with a minimum jaw opening of 5” or hold down clamps for the mill table.
STEP BY STEP
- The CAD is a simple drawing of the Darth Vader mask made in Fusion 360, knowing details were not that important for a cookie mold.
- Extrude 0.24” up to define the outline and the cavities for the mold.
- Then extrude 0.136” down. I extruded this way to match the 0.376” material I had on hand, you'll have to make adjustments according to your macterials.
- The setup was done in CAD using a 5” X 5” piece of the cutting board. A smaller piece could be used if needed.
- Add two pocket operations in CAD using the two different sized end mills to create the shape of Darth's mask.
- Then add a contour of the mask using a 2D contour operation.
- Put your material in the vise and find your work offsets using one of the techniques in the following video.
- Make sure your tool tables are set up correctly, put in the first tool, and hit cycle start. Tool changes will be called out in the G-code as the machine runs the program.
- After the program finishes, pull the part out of the vise and debur the edges with a pocket knife.
- You can now go make some Darth Vader cookies!