This article was originally published in 2016 with only 8 ways to locate Part Zero and has been hugely popular ever since. I’ve updated it with several new methods.
One of the first things you have to do before you can begin machining a part is to find part zero. Part zero is the datum corresponding to the 0,0 coordinate on the CAD drawing that you used for all your CAM work or to generate the G-code for your part program. It’s also called “program zero,” since X0Y0Z0 in the G-code is the location of part zero. Incidentally, locating part zero is often called “touching off.”
For more, check out our G-code programming chapter on part zero.
Every CNC machinist needs to be able to do this simple step, and often having more than one way to do it is helpful. The amount of effort involved is not the same for each one, and some are better for special cases while others are more general. Understanding the whole arsenal of methods will help you to become more efficient by selecting the best one for each job.
Here are a number of methods to choose from.
Method 1: Use an Edge Finder
Edge finders are by far the most common way to find part zero, so we’ll start there. To use this method, put your part in the milling vise or fixture. You’re typically going to make the corner of the part zero. Since you’ll be starting (usually) with unmachined material, it’ll be important to leave some allowance for machining in your CAD drawing. So, part zero sits in space rather than actually being on the part.
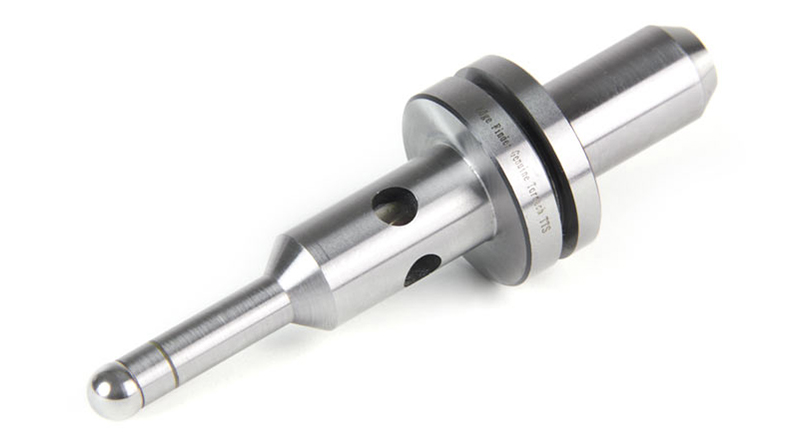
Edge finders come in many varieties, but we’ll group them into mechanical and electrical categories. Electrical edge finders light up and/or beep when they come into contact with the workpiece. They rely on the workpiece to be electrically conductive so a circuit is closed when the edge finder touches the workpiece. Here is a typical electrical edge finder:
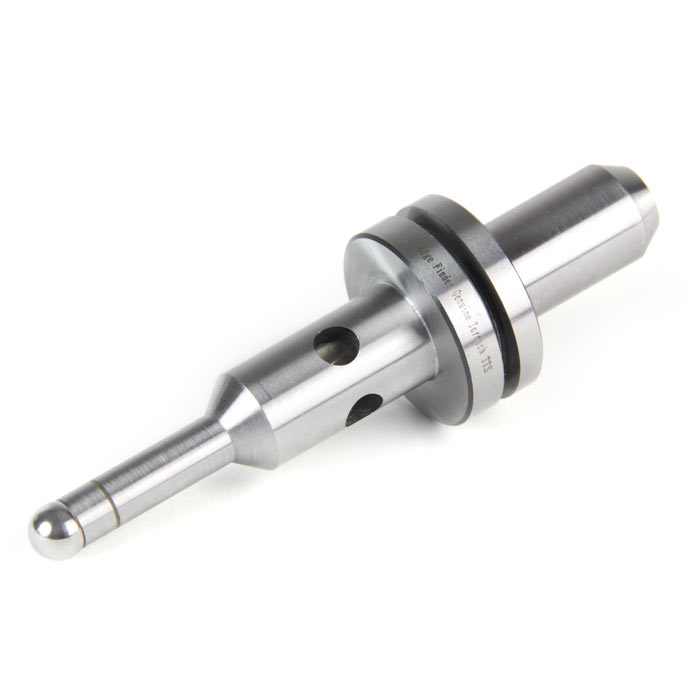
Electrical edge finders like these are extremely easy to use and relatively cheap. If they suffer from disadvantages it would be that the ones with movable balls to prevent damage are not very repeatable, while the ones that don’t have movable balls are pretty easy to break if you jog too far or too fast and crash one into your part.
Mechanical edge finders have been around a long time. They work by spinning at fairly low RPM (careful!) and when you go just past the edge slightly, they “pop” out. This video from Tormach gives a great example of both one of these mechanical and an electronic edge finder in action:
To use an edge finder, you’re simply going to locate an edge corresponding to each axis, X and Y, and zero the machine DRO when you you’ve found the edge. Note that you have to account for the tip radius when zeroing.
Method 2: Use a 3D Taster
Another very common, but more modern and slicker method than the above edge finders, is to use a “3D Taster”. 3D Tasters (often now called “3D Sensors”, but the original translation from German is so much more fun!) were first made in Germany by a company called Haimer, though you can now buy cheaper clones of them. Having tried a clone, I recommend sticking with the original. It’s more money, but much more accurate and sturdy.
I paid more when I bought mine–in fact a lot more since I bought a cheap Chinese clone first, regretted it, then bought the real thing. What can you do with one? What can’t you do? They’re basically fancy yet extremely accurate and easy-to-use edge finders. You stick one in your spindle and use it to find your part zero, edges, corners, vise tramming, and all sorts of other common setup tasks. The reason to want one is they’re faster and easier than other methods.
These German-made precision measuring tools are so handy for so many setup tasks that I keep one in a toolholder all the time and have seen many other CNC’ers do the same.
For finding part zero, use the 3D Taster much like the edge finders. Here’s a Tormach video to demonstrate:
Method 3: Pick a Fixed Location on Your Vise or Fixture
With the other two methods, you have to find part zero every time you drop a new workpiece onto the machine. With this method, you find it once because it is relative to the workholding. Let me give an example. Suppose you use the corner of the fixed jaw of your vise.
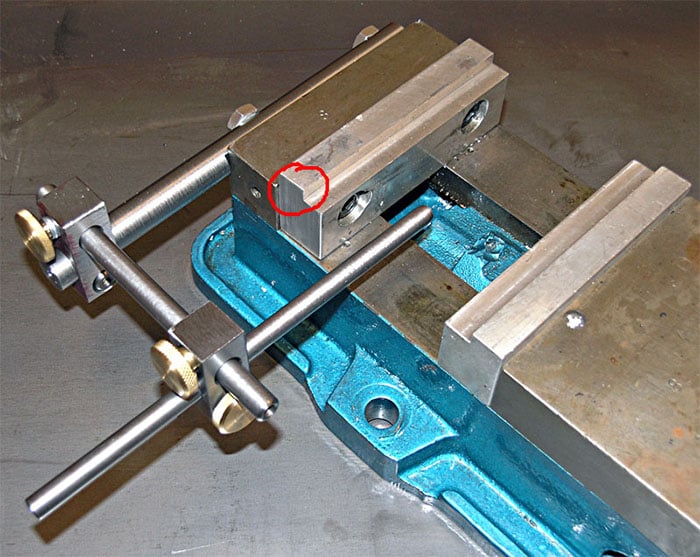
Use the corner of the fixed jaw of your milling vise (circled in red) as your part zero…
This is a wonderful time-saver because the vise sits on your mill table most of the time. As long as you design your parts with the idea that the vise jaw corner represents part zero, you can slap a part into the jaws and start machining without measuring part zero, at least without measuring X and Y. You only need to measure and zero if the vise moves or you change the home position. You may have to re-measure if your machine lacks repeatable home switches too. But any way you look at it, you’ll be setting part zero a lot less often, and that will save you time.
Method 4: Use a Stop of Some Kind
The picture above shows a vise stop I made a long time ago. You can set the stop up to orient a part repeatably to some part zero you measure.
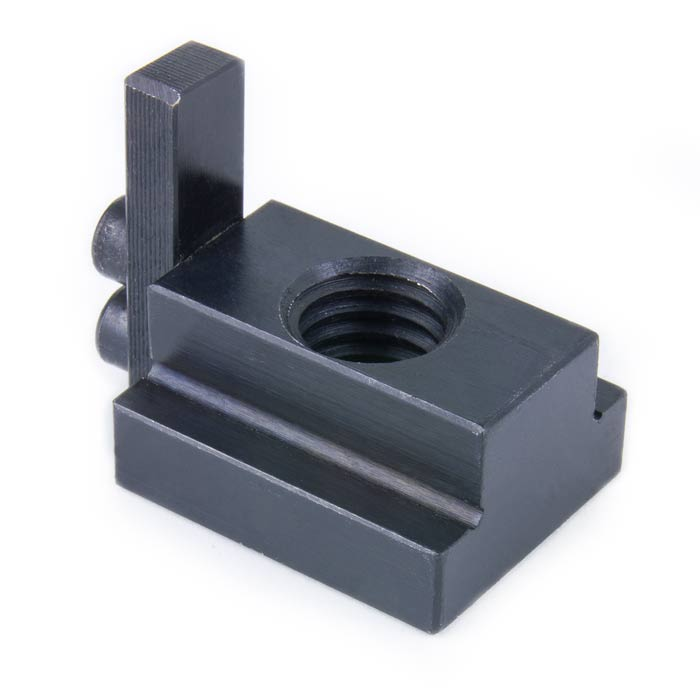
You could put stop features on a fixture plate as another alternative using stops. You can even get stops that fit in T-slots like these from Tormach.
Method 5: Use a Camera or Scope
Centering scopes have been around a long time and with enough care and magnification they can be quite accurate.
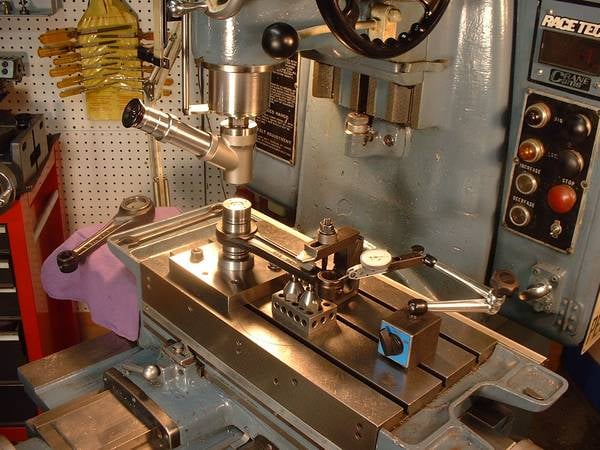
Centering scope lets you optically position part zero.
I will warn you that these centering scopes can be hard to see. Sometimes the optics are not so hot and the image can be quite dim. Ample illumination, perhaps from an additional lamp helps, but a more modern approach is to use a digital camera with magnification. Here’s a shot of the centering scope on Beatty Robotics' milling machine:
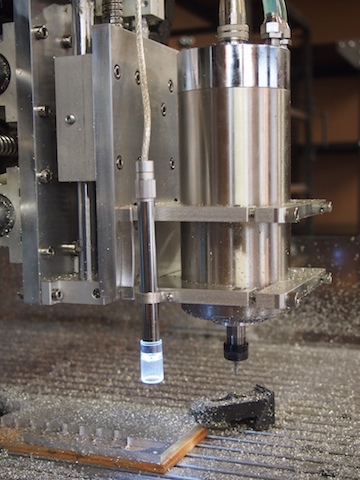
Beatty Robotics Centering Scope.
And here’s a view of the image captured by the centering scope:
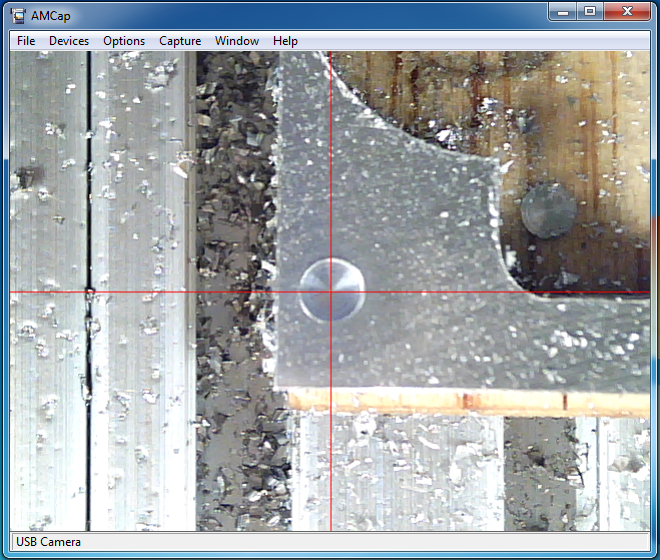
Using a digital camera to center on a spot drill dimple.
Note that the camera is offset from the spindle centerline. That offset is fixed, and can be factored in when zeroing. There are also cameras that go right in a tool holder and will sight right down the spindle axis.
By the way, if you’ve never visited Beatty Robotics, check it out. It’s a family venture where Father Beatty does all sorts of wonderful CNC projects with his daughters. Really cool stuff, and they even use G-Wizard.
Method 6: Zero On a Part Feature
This is not an entirely independent method because you need to use one of the other methods to properly locate the part feature. But, it is extremely useful for second ops and cases where you have to put something other than a rough piece of material onto the machine, perhaps for a repair or reworking job.
The idea is to zero on some feature of the part. For example, we used a spot drill dimple with the digital camera above. In fact, locating on holes can be done very accurately so this is quite a common type of feature to use. Of course the feature doesn’t have to be at part zero. It simply has to be located at a known offset so that once you’ve found the feature, you can apply the offset to get part zero.
Method 7: End mill Plus Paper, Feeler, or Gage Block
Finding part zero with an end mill is another very common approach. The idea is to approach the part with the end mill and use a spacer of some kind so the end mill doesn’t actually contact the part. Common spacers include a piece of paper, a feeler gage, or a gage block. Except in the case of the paper, you will want the spindle to be stationary for this method.
I did some experiments one time to try to determine how accurate this sort of method is. Here’s what I found from several methods for touching off in Z.
Touch off by feel: For my first method, with the spindle stopped, clunk down the cutter onto the top of the workpiece. Zero the DRO and go from there. This produced a result with an error of 0.012″. Not very good! The error was relatively repeatable, so one could add the fudge factor. In the end of the day, the cut was 0.012″ deeper than desired. This is also not especially good for the cutter or your spindle bearings if you’re not careful.
Touch off by sound: For my second try, I gently lowered the spindle under power and listened for when the cutter started to cut. This method proved slightly more accurate, and resulted in 0.0085″ too deep a cut. Still not very good.
Touch off with paper: The traditional old-school method involves holding a piece of cigarette paper (rumored to be exactly 0.001″ thick) on the workpiece and gradually lowering the cutter until it starts to catch the paper. Add another 0.001″ and you are at zero! Not having any cigarette papers, I used standard laser printer paper. I cut a 1/2″ wide strip so I could hold onto one end from a safe distance, and waited for the cutter to grab. In my case, I got a grab at 0.010″, not 0.001″, but at least it was a nice round number and pretty repeatable.
Z-axis Presetter: Last in the tests was a cheap Z-axis presetter I bought off eBay. They look like this:
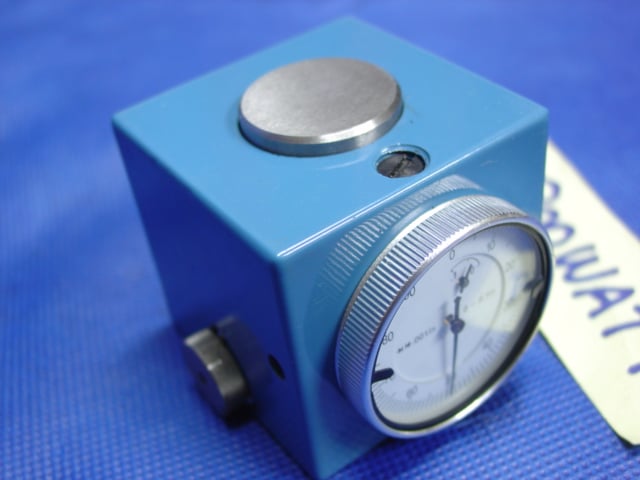
How does it work? Simple. There is a little knurled knob visible on the bottom left. It has a “test” and a “use” position. Set it to “test” and an internal standard swings into place so that if you press the anvil on top with your finger until you hit the stop, you’ll have exactly 2″ from top of anvil to bottom of gadget. You rotate the dial to zero in that position. Now reset the knob to “use”, place it atop the workpiece, bring the cutter down until the needle registers, zero the needle, zero your DRO, and you should be exactly 2″ above whatever the presetter is sitting on.
So, not expecting much, I plunked the sucker down atop my aluminum cube in my Kurt vise on the mill, cranked the head until the cutter almost touched. Locked the head and cranked the quill with the fine adjust until the needle zeroed, zeroed my DRO, removed the presetter, cranked down another 2″ with the fine adjust, zeroed the DRO again, added 0.010″ for a modest cut, ran the cube through under power feed, and hauled the block over to the surface plate to see what I had done.
The desired result was 2.396″. I brought the height gage down to take a reading which was, drumroll please, 2.396″. Holy uncanny accuracy, Batman!
They make much nicer and more accurate devices than this, so I mostly don’t see the value in the other methods I tried. I will say, a gage block can be extremely accurate. Just be sure you use it by sliding between tool and workpiece, pulling it out, jogging, and checking until it won’t fit. Don’t jog with the gage block in place as it is bad for the gage block and the cutter.
Method 8: Laser Sight
This method is very visual, but not terribly accurate. You can mount a cheap laser in a toolholder that’ll project a nice red laser spot on your work that’s on the spindle axis. Here is one that Tormach offers.
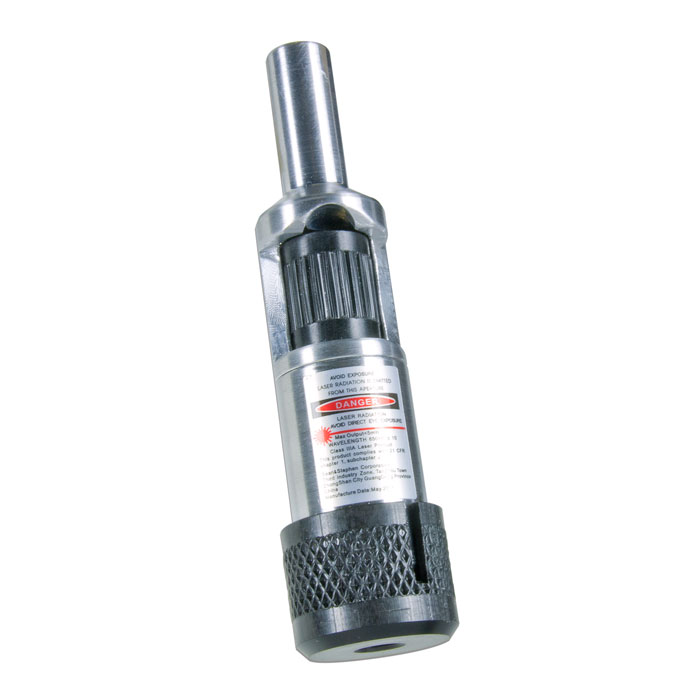
Laser “bullseye” from Tormach.
So long as you don’t count on it to be super accurate, it might be the perfect tool for setting part zero for you. Take for example the case where you’ve designed your part so that part zero is a corner of the rough stock and is “out in space” rather than actually on the part itself. You’re going to machine away the excess and your allow for perhaps 0.150″ of rough stock. So long as you find the edge within say half of that (accurate to 0.075″), all is well. These little lasers are certainly capable of that. Or, perhaps you’re simply doing some work on a CNC router that doesn’t require tight tolerances. Again, you can locate that laser spot well enough for a lot of that sort of thing.
It’s probably worth sticking one in your toolkit just in case. Some people swear by them.
Method 9: CNC Probe
I’ve saved the best for last–a high quality CNC probe is more automated and can be more accurate than any other method. Probes go in the spindle and use a stylus tip to probe the part.
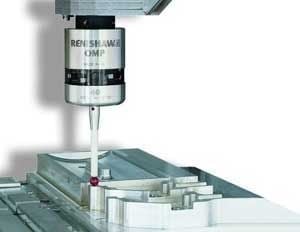
3D touch probes can be highly accurate.
Probes can be controlled via g-code and used for a variety of tasks. They can locate edges, the centers of holes or bosses, and all sorts of other things. Using the right G-code, you could completely automate the process of finding part zero. Just put the code at the beginning of your part program and the operator can drop a part in the vise, push the green button, and let the machine figure out the rest. It’s pretty amazing what these things can do, really. The main disadvantages they have is they’re going to be the most expensive method and the probes themselves can be damaged in a crash, which makes things even more expensive.
Method 10: Close Enough to “Eyeball”
With this method, you have written your part program to assume the part is buried some distance inside the workpiece. That distance determines how accurately you must locate part zero.
If the part program is written to assume the part is 0.25″ inside the workpiece, that we need only make sure the workpiece is large enough to contain that much waste around the finished part and that the workpiece part zero is located within 0.25″ of the actual part zero. That’s such a large margin for error you can easily eyeball part zero.
Method 11: Use Your Machine to Set a Stop
Here’s a method suggested by our readers in the comments below–thanks folks!
Stick a pin in a tool holder, position with your part program, and let the pin be a stop when you put the part in your vise. You’ll need to compensate for the diameter of the pin in your program.
This makes it easy to do parts that are much shorter or much longer than your vise jaws. I do something similar on my CNC lathe all the time when I position a tool so that I can pull the bar stock up and use the tool as a stop to begin a new part.
Conclusion
Now you have 8 ways to manage Part Zero for your CNC Projects. Each one has its own strengths and weaknesses. There are many more methods out there. Finding Part Zero for some kinds of 5-Axis work or work on parts with complex shapes can be very daunting. I haven’t touched on methods involving DTI’s, Toolmaker’s Chairs, Zero Set Holders, and the like. I’ll leave those as an exercise for you, the gentle reader, to undertake and comment on.
Tell us what your favorite methods are that we’ve missed down in the comments–share the wealth with your own special techniques.
This post originally appeared on the CNC Cookbook blog.
