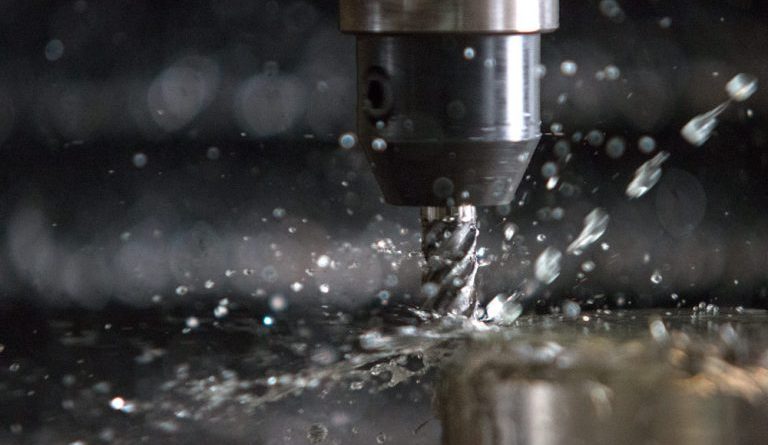
Most of the time, machinist’s focus on the hardware aspects when they think about surface finish: – Do I have the right feeds and speeds? – Is my setup and machine rigid enough? – Is there too much runout on the spindle? This is definitely the right place to start, but it’s not the end of the story. A great many factors affecting surface finish are tied up in the CAD/CAM software used to create the part program. For example, the part in the photo on the right exhibits a faceted surface finish. This is definitely a software issue (although there are certain servo mis-tuning situations that can lead to that sort of thing). Let’s take a look at some of these critical software issues that affect surface finish:
1. Chordal Tolerances
CAD and CAM programs will often simulate smooth flowing curves with a series of line segments. When this is the case, and it has to be the case for many kinds of curves because most CNC controllers only do lines and arcs and there are many more kinds of curves in the world, it’s important to look at what “Chordal Tolerances” are in use. Note that your CAD and CAM programs may use alternate terminology, so follow along to understand the principles and then you’ll know how to recognize which parameter to change in your software. To understand Chordal Tolerance, think of simulating an arc with a series of line segments. 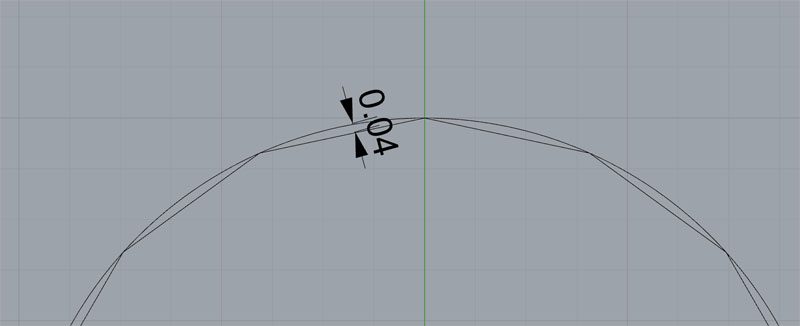 The lines are chords of the circle, hence the term "Chordal Tolerance." The trick for surface finish is to pick a chordal tolerance that maximizes your finish while maintaining your part’s tolerances. Since we have the luxury with computers of using as many line segments as we like, we can make the Chordal tolerance arbitrarily small. My CAD program, Rhino3D, defaults to a tolerance of 0.001″ with the settings I use because most of the time I’m not trying to make parts with tolerances better than that. While this may be sufficient for tolerance, it is very common to discover that good surface finish requires even tighter Chord Tolerance. Moldmakers may find they need to use a tolerance as low as 0.00004″ to achieve good enough surface finish. What happens if you don’t use a low enough Chordal Tolerance is you get a faceted finish, like the part shown at the top of this article. Parts like that one are ideal for testing different tolerances to see what works. Here’s another example, courtesy of Autodesk University:
 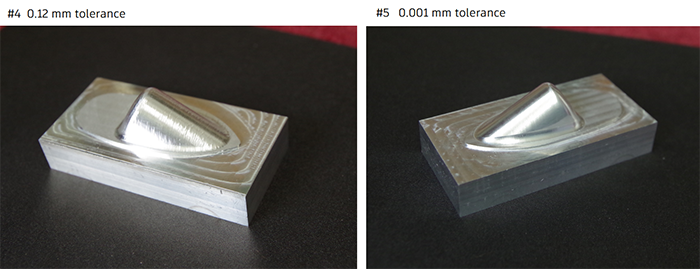 The part on the left, which is noticeably rougher, was cut with 0.12mm tolerance and the part of the right with 0.001mm tolerance.
2. CAD File Format Issues
Closely related to Chordal Tolerance will be various file format issues. For example, you may be using STL files to save the 3D models of your parts. STL is a simple file format that represents the 3D model as a series of triangles. Having to simulate smoothly flowing shapes with triangles is the 3D equivalent of simulating smoothly flowing curves in 2D with line segments. Exactly the same considerations apply, and you’ll need to make sure the parameters used by your CAD and CAM programs for their STL files are set to small enough tolerances to avoid visible faceting.
3. and 4. Best Stepover and 3D Machining Strategies
It’s hard enough to get great finishes in 2 1/2D machining, but 3D is much harder. After all, you’re trying to cut a smoothly flowing surface with a ballnosed cutter that produces scallops. There are at least two key things to think about when 3D machining. First is Stepover. Robert Grzesek, the author of the MeshCAM 3D CAM software, wrote a great guest post for us on how to choose the best stepovers. It’s worth your time to give it a read, but here are the highlights:
- The stepover should be between 1/3 and 1/10 of the tool diameter
- Use a larger stepover, in the 1/5 to 1/3 range, for soft materials that cannot hold detail well
- Use a smaller stepover, in the 1/5 to 1/10 range, for hard materials or materials that can hold significant detail like metal and jewelers wax
- Use the largest tool that will allow you to machine your geometry
The second key thing is which toolpath strategies to use? Robert has also kindly provided us with another guest post on how to choose the right kind of toolpath for different 3D machining jobs. Take a look at the article, but it turns out that several strategies will typically have to be blended to deliver the best surface finish. Here is a software simulation of such a blending: 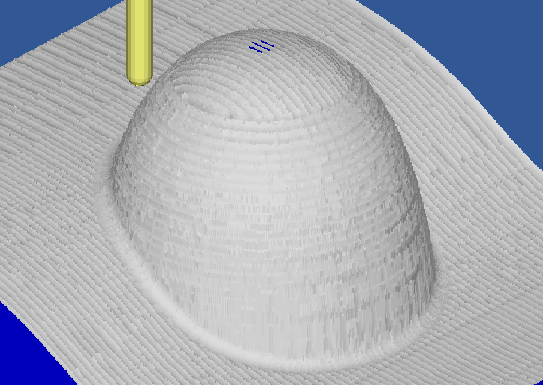
5. Too Many Moves!
One of the takeaways you probably have by now is that you should radically crank down the chordal tolerances, employ multiple toolpath strategies, add more triangles, more line segments, and generally more, more, more. This is probably the right time to talk about the dark side of all that: you can reach a point where your g-code file has so many moves that it becomes counter productive. There is certainly a problem from the standpoint that at some stage you’ll just slow everything down, and there is a problem in that some machines have very finite limitations on how large a part program they can store, but I’m talking about even bigger problems. You can stand by and wait a little longer and you can drip feed to shoe-horn a big program into a small memory controller. Read: 4 Bits of Knowledge That Separate a Beginner Machinist from a Pro What you probably can’t do is make your controller run faster. With enough moves fired at them, controllers will begin to bog down. Taken to the extreme, we can calculate the least amount of time the controller takes to process a single G01 move along a line segment, and there will be some segment, at some feedrate, such that the segment is so short, it takes the controller longer to process the move than it does for the cutter to travel the length of the segment at the current feedrate. While you will have seen problems and degradation in finish before that point, when you get to that stage, the controller starts getting further and further behind on every move and eventually chokes.
What’s the answer for “Too Many Moves”?
There are two. First, by all means, crank down those tolerances and do some experiments on curvy parts to see what’s needed to eliminate faceting and maximize surface finish. Also, try to find the limits of your machine’s controller. Look for the point where you’re feeding it so much detail that surface finish starts to degrade. These are obviously very valuable pieces of information, and they can only be learned by trail and error, so keep a record of them once you discover these limits. Knowing these limits tells you what you need to shoot for. The second answer is to optimize your g-code within those limits. It turns out there is a very useful practice called “arc fitting” or “line/arc filtering." The idea is to select a tolerance, and then combine line segments into arcs that approximate the lines within the tolerance. It’s sort of like Chordal Tolerance in reverse, but it works because most CNC’s can interpolate an arc very smoothly. The end result is much less faceting and much shorter programs that are easier on your poor old controller to run. In fact, you can set the arc fitting tolerance much close to your part tolerance instead of having to make it much finer. You’ll need some software to do arc fitting. Some CAM programs have it built-in, and you can Google to find various packages that offer it as utilities. Eventually, I will add it to G-Wizard Editor as well. And here’s the effect on parts: 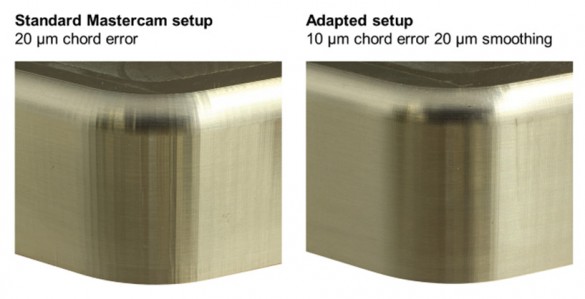
The part on the right had chordal tolerances reduced to 10 um and smoothing to an accuracy of 20 um. Note the much finer finished that was achieved!
6. Climb vs Conventional Milling: Make Deflection Work for a Better Finish
CNC Machinists are taught early on to always use climb milling, which is unfortunate, because there are times when conventional milling produces superior results. I won’t get into all the cases (for that, check out the article on Climb vs Conventional Milling in our Speeds and Feeds Cookbook), but let’s just consider the basics. There are two essential insights about Climb and Conventional Milling:
- Climb Milling requires less cutting force. This is the main reason most argue to use it for everything, including finishing.
- Conventional milling deflects along the tool path while climb milling deflects into the wall of the cut. This is the secret for why Conventional may produce a better surface finish, depending.
Clearly there is a little bit of tension in the trade-off. With less cutting force, we may have less deflection to start with and not have to worry about it. Here’s the thing though: when you look at something along a very oblique angle, the eye can see surprisingly minute variations. If your cutter deflects into the wall of the cut even a little bit, it produces a wavy effect that will be visible. The thing is, every cut is different and this may or may not be happening. I tend to always make my finish cuts conventional milling cuts just because I may take advantage of the phenomenon and there isn’t much downside. But, if surface finish is an absolute must, you should experiment and try both ways to see which one performs better.
7. Tactical Toolpath Considerations: Entries, Exits, Corners, Direction Changes, and Dwells
I’ll finish this post on a somewhat tactical note–any change in the toolpath is an opportunity for a surface finish problem. As Machiavelli said about change:
There is nothing more difficult to take in hand, more perilous to conduct, or more uncertain in its success, than to take the lead in the introduction of a new order of things.
Change happens when we enter the material, leave the material, change direction from a straight line or smooth arc, and when we stop moving. Every one of these things disturbs the cutter in such a way as to leave a mark in the surface finish. Anything you can do to minimize the amount of the change will improve your surface finish. For example, the best CAM programs don’t change direction by issuing a G01 move in a different direction during the cut. They blend that change by putting an arc on every corner. It’s surprising how much of a difference something like that can make. Likewise, if we enter or exit a profile, don’t just make a move with the tool perpendicular to the wall–try to make the move tangential. If you can align the entry and exit tangentially on a corner, you’ll have the ideal entry and exit: 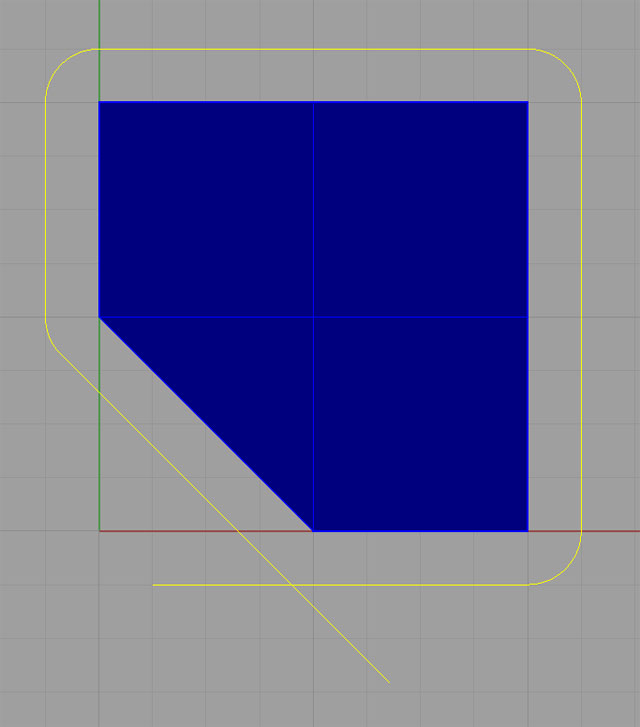 Sometimes you’ll have to go through considerable gyrations to get your CAM software to line things up in this way, but it’s worth the trouble. If you can’t do the tangential moves, arc your way in. There are a lot of good strategies for entering and exiting cuts, and they’re discussed on the Toolpath Considerations page of our Feeds and Speeds Cookbook. Another possibility is to rearrange the toolpath so direction changes happen off the part. The ability to do this will be a function of part geometry, but if you can manage it, keeping direction changes off the part will reduce the witness marks that can mar surface finish. This post originally appeared on the CNC Cookbook Blog.
